> Tips & Ideas
Custom Dock Fenders
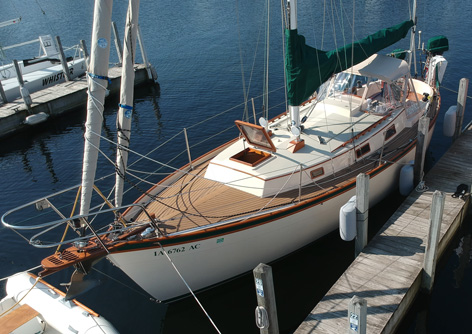
We have always hung fenders from the lifelines as we’re docked. As we leave for a sail, the fenders are stowed away below. I’ve never liked the looks of fenders dragging along or tossed onto the deck while sailing. As we return to the dock the fenders are hung again from the lifelines and they get tortured by the dock posts as the boat slides along the dock.
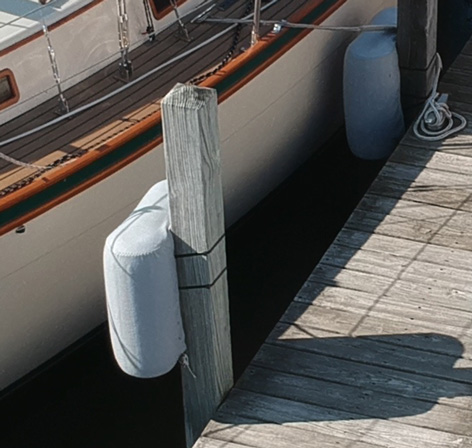
Just to make life easier I decided to tie permanent fenders to the dock. Not a new idea, but my system is a better mousetrap. I bought four Taylor-Made rafting fenders and strapped them to the dock posts. I placed each fender at the perfect height. The first time I came back to the dock I was excited to see how they worked. As it turned out, they didn’t work that well. While coming into the dock, as the boat rubbed against the fenders the friction caused the fenders to spin around the post rendering them pretty much useless.
After a little rum I started thinking more clearly. “How about putting fender covers on them?” A web search produced no covers made for rafting fenders. So we decided we would make some. I found some heavy felt at our local fabric shop, and soon we had some handsome covers that fit the fenders perfectly. The boat now slides along the fenders smoothly without spinning the fenders!
As an added bonus, the fenders stay quiet at night. Yay!
See below for step-by-step illustrations on we made ours.
Article written & illustrated by: Jim Downing
How-to Make Permanent Dock Fenders
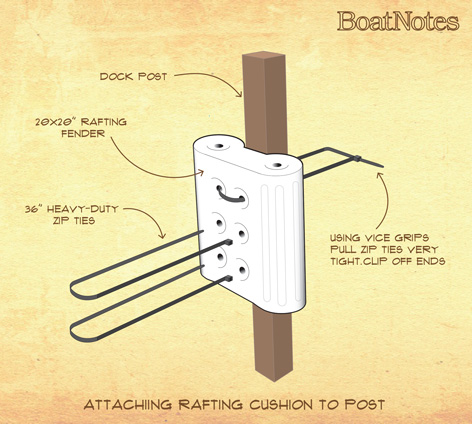
I choose 20×20” rafting fenders because they fit the 6×6” posts on my dock. The large fenders also added extra protection for my teak rails. 15×15” fenders are a less expensive option and are perfect for 4×4” posts found on many docks. I used heavy duty zip ties to attach the fenders to the posts. As a side note these zip ties are huge, measuring in at 3/8″ in tie width. Don’t use cheap ties, make sure they are industrial grade.
Making the cover
I made my covers using heavy felt, but you could use a variety of fabrics to make yours. Fleece is a popular material as well. A word of caution: Don’t use Sunbrella as it’s abrasive to gelcoat and varnishes.
We made patterns and created a notched cover that slides over the fender. However, you can also make a cover that simply wraps around the fender. Click here to see an easier option if you feel that your sewing skills or time investment are limited.
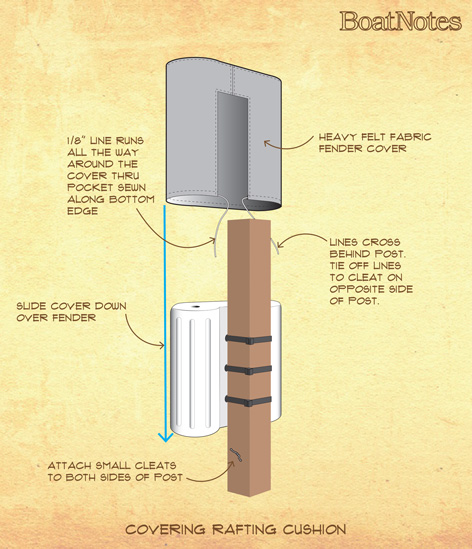
The notched opening in the cover allows it to clear the zip ties used to mount the fender to the post. The cords cinch up the cover around the fender and also hold it down in place. Be sure to make them extra long.
Start by cutting all cover pieces as shown on the Felt Fabric Patterns drawing. The dashed lines represent where the edges of the fabric are folded and sewn. Note that the bottom hemline is wider, allowing more space for the cord. The cover is made inside out as shown. The sewing starts with the notched opening. sewing the hem along it’s edges. To keep things simple, I added reinforcing patches in the corners.
Using the Assembly Drawing as a guide, continue sewing your cover together. A potential pitfall when sewing the top panel in place is that you end up too long or short as you finish stitching around the perimeter. A tip I learned from my wife is to pin it together along the seam first, adjusting as needed. When your’e finished sewing, turn it right side out. You’re done!
Finally, slide the fender in place. I found that adding small cleats on the post made tying it down much easier. Be sure to cross the tie lines to the cleat on the opposite side of the post.
Fender Cover Patterns
