> How-To
Plugging an Old Through-Hull Hole
One popular upgrade to many boats is electronics. Along with vastly upgraded plotters, network systems, Wi-Fi connections, the thru-hull transducer units themselves have evolved over the years as well. The electronics are now housed inside the transducer itself sending NMEA information to the network and they no longer require a dedicated Speed or Depth display. They have also become more compact allowing the speed, depth, and temperature to be housed in a single thru-hull transducer.
For new boat owners this requires only one thru-hull hole to be drilled. But for older boats this means you now have an extra thru-hull that will need attention. You could just leave the old thru-hull with a dummy plug in it but it’s one more thing to check routinely.
Here’s a simple way to just fill in the hole permanently and make it disappear.
Remove the transducer and prep the hole
The old transducer thru-hull It was more than likely glued in with a polyurethane sealant so don’t be surprised if you have to ruin it to get it out. Once you get the old thru-hull out clean the area making sure to remove all the old sealant completely. The hole should have a chamfer (beveled edge) on the outside of the hull that created the sealant O-ring. Use a half-round rasp tool make this chamfer slightly bigger.
Prep the hull.
To prep the inside of the hull grind away any gel coat or paint to expose the fiberglass in an area approximately 6×6”. A Dremel tool with a flat metal grinding disk works well. For the outside of the hull, remove any bottom paint in a 3” area around the hole.
Make a plug with a hole saw
You’ll need to make a plug for the void. Some home improvement stores now carry low-grade marine plywood, but solid mahogany will work fine as well. Using a hole saw the same size as your thru-hull hole will create a scrap disc roughly 1/8 – 3/16” smaller in diameter, depending on your actual hole saw. We’ll use this scrap disc as the new filler plug to fill the thru-hull later.
Prepare your fiberglass sheets
Cut out six or more 5 x 5” sheets of 6oz woven fiberglass and four or five 6 x 6” sheets of 12oz triaxial or biaxial fiberglass.
Installation
- Clean the entire area so it’s clear of any dust and particles.
- Tape off the hole on the outside of the hull using 2” blue-painters tape.
- Mix a small pot of epoxy resin and West System 406 Colloidal Silica to about the consistency of peanut butter.
- Using a plastic mixing stick, dap the silica mixture into the bottom of the hole, trying to get enough in to fill the chamfer (this is why it was made it slightly larger during preparation).
- Mix up a batch of epoxy resin. We recommend slow hardener so you’re not rushed and can take your time.
- Pre-soak your six sheets of 6oz glass with epoxy resin.
- Lightly coat the wooden plug with epoxy resin.
- Lightly coat the entire 6×6” surface previously ground away and coat the inside walls of the hole.
- Lay in one 5×5” 6 oz. fiberglass sheet at a time. Push the filler plug into the hole. You want it to be a little snug and not loose, remove the plug and add more sheets of 6 oz. fiberglass as needed until it is snug. Take care not to push too hard or you will break the tape on the outside of the hull. You may be tempted to use the heavier glass to fill the gap quicker, but it will not conform to the round shape very well, so resist that temptation.
- Once the gap is filled between the filler plug and hull you can now apply the 6×6” heavier fiberglass over the top.
- Allow the epoxy resin to fully harden overnight.
- Remove the tape from the outside of the hull. Using a 2-3/4 x 16” longboard sand as smooth as possible. A word of caution; the silica filler is extremely tough and harder than gel coat so the surrounding gel coat will sand away faster if not careful. Power tools like a random orbital sander are not recommended.
- Fill any gaps and voids using West System 407 low-density filler.
- Fair the area again using a longboard until perfectly smooth.
- Reapply barrier coat and bottom paint.
Article and illustrations submitted by Jamie Downing
Supply List
- 6 oz. Woven Fiberglass
- 12-18 oz. Uni-Directional Triaxial or Biaxial Fiberglass
- Painters Tape
- Marine Plywood or Mahogany
- West System 105 Epoxy Resin
- West System 206 Slow Hardener
- West System 406 Colloidal Silica
- West System 407 Low-Density Filler

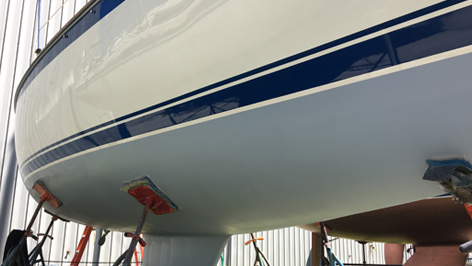
Plugging old thru-hull holes the right way will ensure that the bottom of your boat remains maintenance-free as well keeping it as smooth and fast as possible.

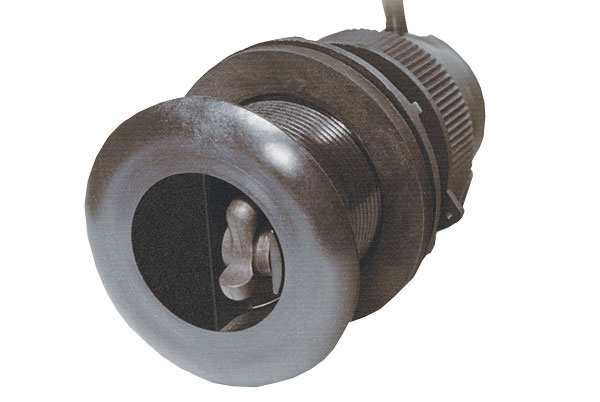
New transducers for boat speed and depth, like this one from Airmar (shown above) now incorporate all of the electronics into one convenient single transducer.

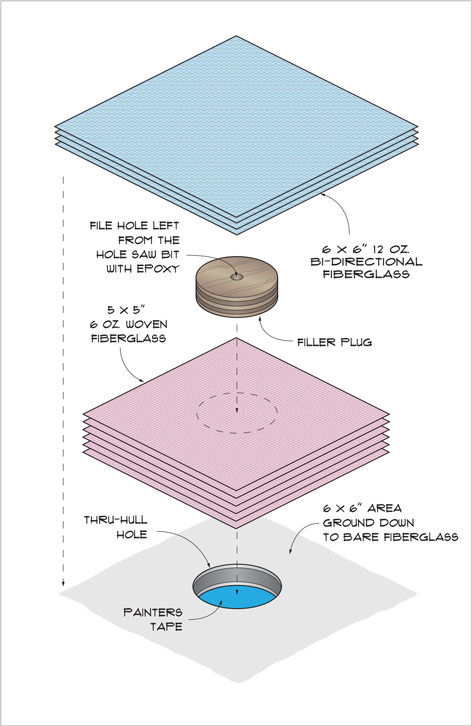
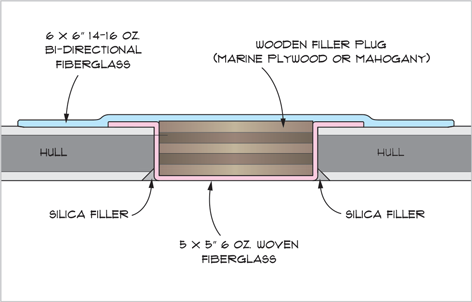
The illustration above shows an exploded view of how all of the materials are integrated to fill and cap the old hole. A wooden plug surrounded by fiberglass top and bottom will provide a permanent maintenance-free way to fill the void.

